Easy to follow steps on how to change brakes
Click on the following links for all of your automotive brake part needs - as well as searching for any other automotive parts.
How to change brakes in a step-by-step procedure
This guide will show you how to change brakes with step-by-step instructions. This is a general guide that applies to most vehicles with disc brakes and not specific to any particular vehicle
Please pay attention to the safety information and the procedures outlined so this job can be completed safely.
By knowing how to change brakes, you will save a considerable amount of money and have the satisfaction of working on your own car.
Your brakes are one of the most important safety features on your car, and it is important to completed the job properly and then test the brakes to ensure that they are working properly.
Below, we have outlined the steps on how to change brakes.
1. Loosen up the bolts on the wheel before jacking up the car, as it will be easier to remove the bolts later. Do not remove the bolts at this time – only loosen then up.
2. Jack up the car and put it onto jack stands. Do not work on the brakes until the car is supported properly by jack stands or similar support other than just the car jack. Use wheel chocks or something similar to put behind the tires that are still on the ground. This will prevent the car from rolling.
3. Loosen the tire bolts completely and remove the tire. With the tire removed, you can now see the brake mechanism and you will be able to safely work on the brakes.
TIP: Remove the cap on the brake master cylinder, as this will prevent any pressure build up in the brake lines. It will also be helpful if you turn the wheel towards the wheel you are working on, as this will allow you better access to the brake components
4. Remove the brake calipers - two bolts on the backside hold them on.
5. Once the calipers are removed, you will be able to pry off the brake pads. Inspect the rotor to determine if it is still in good shape or if it should also be replaced. Look for evidence of rusting, cracking, warping and if there is any damage, the rotor should be replaced
6. If the rotor does need to be replaced, remove the caliper brackets first, and then pry off the rotor Before replacing the old rotor, clean the hub with a steel brush or something similar The new rotor may have some oil or residue on the surface, so it is a good idea to use a brake cleaner to remove any contaminants and ensure a smooth, clean surface.
7. Install the new rotor, reattaching the caliper brackets (clean caliper brackets before reinstalling them and ll lubricate the pins to ensure that they move freely)
8. Install the new brake pads onto the caliper making sure that the friction side goes inwards. If you install them
backwards, the metallic side will be against the rotors and you will hear a metallic sound when the brakes are used and you will then have to reverse the brake pads.
9. Reinstall the caliber brackets in the same way they were removed, making sure to torque the bolts to the manufacturer’s specs
10. Inspect the work you have done to ensure that it is all put back together properly. Inspect the brake lines to see if there is any damage, cracks or leaks and if so, now is the time to repair/replace the brake lines
11. Put the wheel back on and only lightly tighten the bolts
12. It is now time to lower the car back down off the jack stands. After the car is back on the ground, you now must finish tightening all of the bolts on the tire. It is recommended that you tighten them using the star pattern (tightening opposite bolts) and to also use a torque wrench to ensure they are correctly tightened
13. Check and top up the brake fluid before going for your test drive. Pump your brakes several times before driving until the brakes feel firm as you need to get the pressure back up in the brake lines.
14. Tests drive the car now by pumping and testing your car brakes at slow speeds at first and then with increasing speed. Also test the brakes with your car backing up.
By following these simple steps on how to change brakes, you will ensure that your new brakes are working safely and you will have the satisfaction of working on your own car as well as saving a substantial amount of money.
To help you even more with your car maintenance, I was able to find this automotive troubleshooting site which might be able to save you some money, teaching you how to care for your car properly.
When should you change your Brakes?
The brakes on your car are one of the most critical safety components in your vehicle and you must be certain that they are working properly.
The following are some signs that your brakes may need service:
* Brakes that squeal
* Brake pedal has lots of play and goes almost to the floor before the brakes work
* Brake pedal pumps up and down
* Brakes grab on one side or the other pulling the car
* Brakes that stay on when pedal is pushed down then released
* Brakes that lock up hard when pedal is only gently depressed
* Brakes that grind
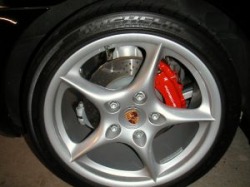
Sample picture of a car tire with brake components showing
